Installing the Cokima CK3 on a BMW R1250GS
Installing the Cokima CK3 on a BMW R1250GS
Installing the Cokima CK3 on a BMW R1250GS

Installing aftermarket tech on your bike isn’t always plug-and-play—especially when the product is labeled “universal.” In this post, I’ll take you through my full experience installing the Cokima CK3-PLUS on my 2023 BMW R1250GS, from the tools I used to the wiring challenges I had to solve. If you’re planning a similar install, this guide might save you a few headaches.
Why I Installed the Cokima CK3-PLUS
The Cokima CK3 is a smart riding system that offers cameras, GPS, radar, and more. It’s a great upgrade—but not without its installation quirks. The wiring harnesses were “universal,” which meant custom work was required to make everything fit neatly and safely on the R1250GS.
Tools You’ll Need
Here’s a quick list of tools I used:
Torx T20 – for removing the OEM BMW GPS holder
Torx T25 – for fairings and the positive battery pole
Torx T30 – for removing Fuel-Tank Cover Middle
10mm wrench – for the negative battery pole
Multi-purpose electrician tool
Side cutter pliers and regular pliers
Zip-ties and shrink wrap
Prepping the Bike
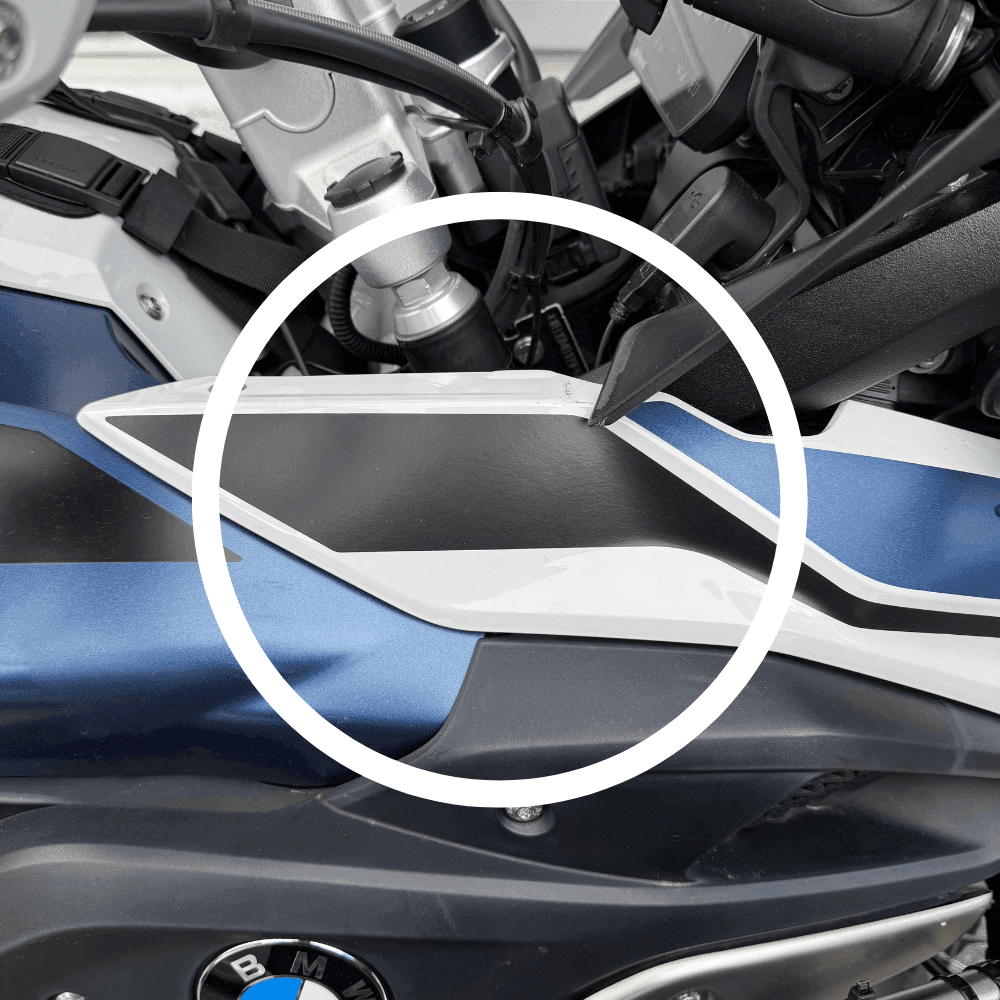
Before diving in, I placed the bike on the center stand and removed the seats. Then I removed the following fairings in this order:
Side Panel Right
Side Cover on Fuel Tank Right
Fuel-Tank Cover Middle
Top Front Wheel Cover (just loosened the right side)
Fuel-Tank Cover Right (loosened it without removing the expanding rivet)
Battery Cover
I also disconnected the negative battery terminal and covered the contact point for safety.
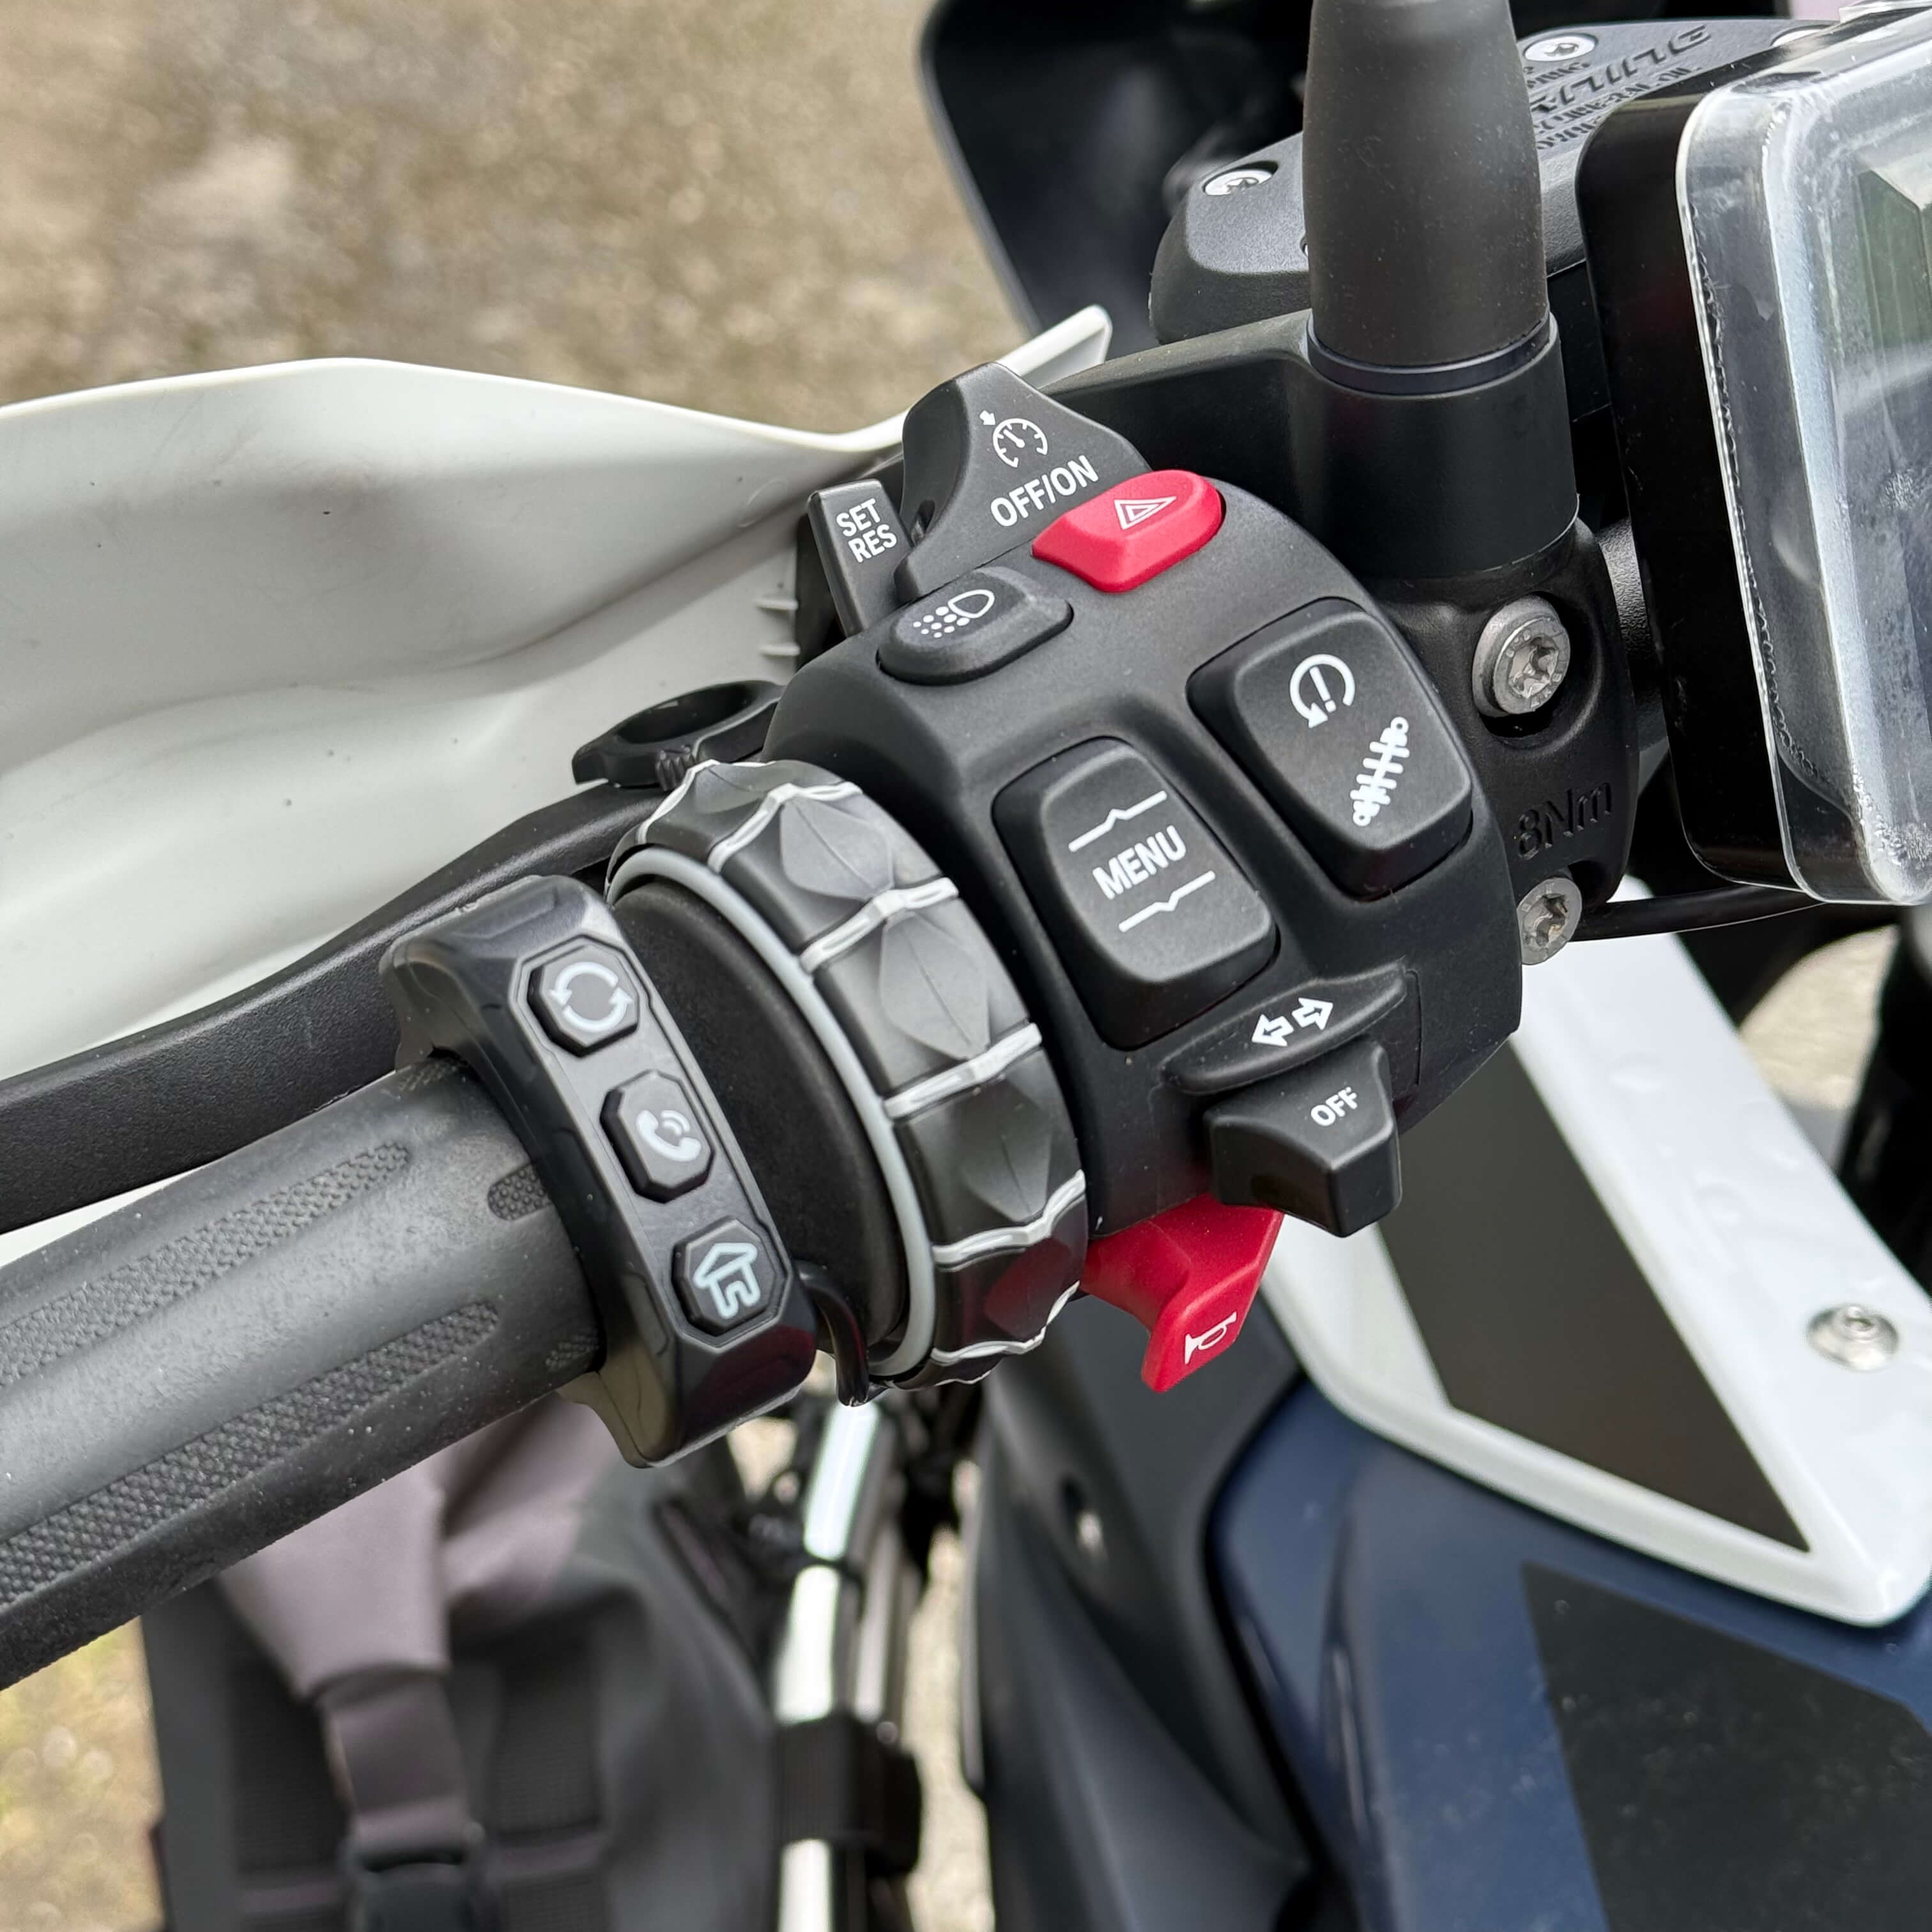
Next, I removed the BMW OEM GPS Prep Set by undoing four Torx T20 bolts, cutting all zip-ties, and unplugging the connector.

Installing the Cokima CK3-PLUS System
1. Mounting the Main Unit
I started by installing the Main Unit (Host) and connecting the wiring harness to it. The hardest part here was finding a clean spot to hide all the connectors. After some trial and error, I found the perfect location—just under the right side of the Top Front Wheel Cover.
2. Connecting the Components
I installed all the components:
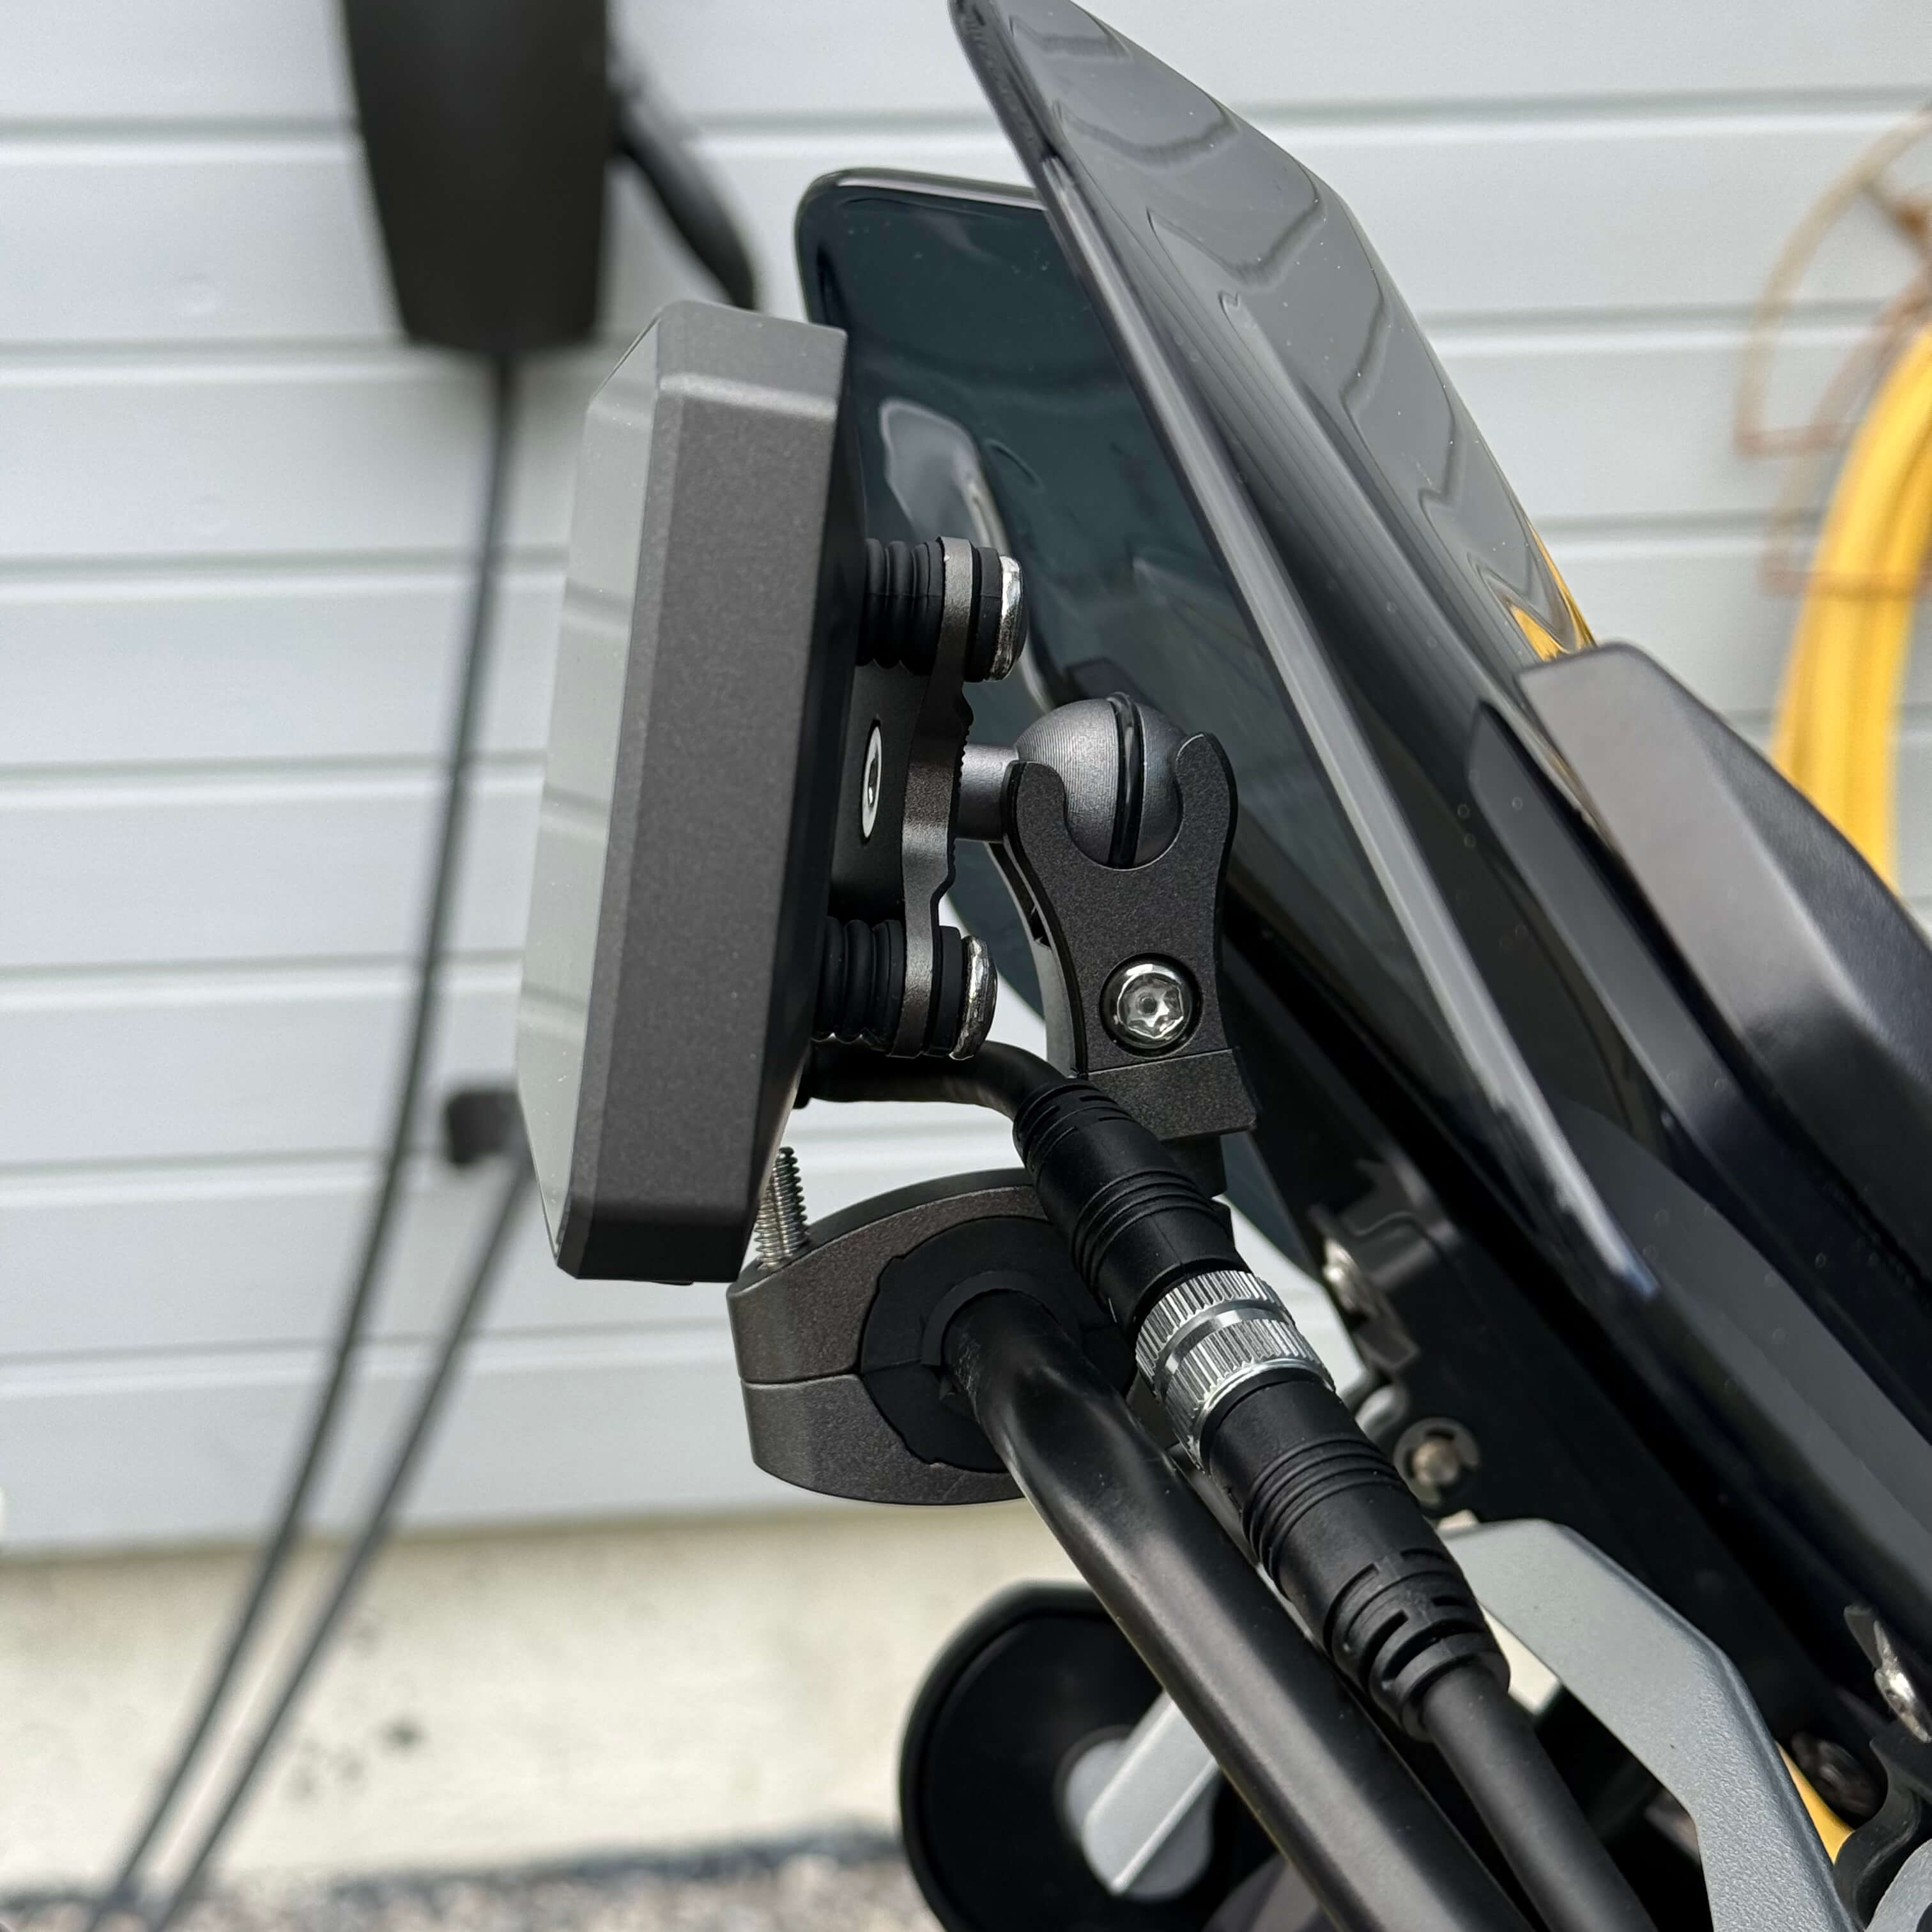
Cameras
Wave Radar
GPS
Controller
Power Unit (black box under the rider’s seat)
Everything was connected to the wiring harness. To keep things tidy, I zip-tied all cables under the Fuel-Tank Cover Right, turning a mess of wires into a clean, single bundle.
 |  |  |
 |  |  |
3. Hiding and Reassembling
Once everything was connected, I hid all the wiring as planned and reassembled all the fairings—except the battery cover, which I left off for the final wiring stage.
The Real Challenge: Power and ACC Wiring
Here’s where things got tricky:
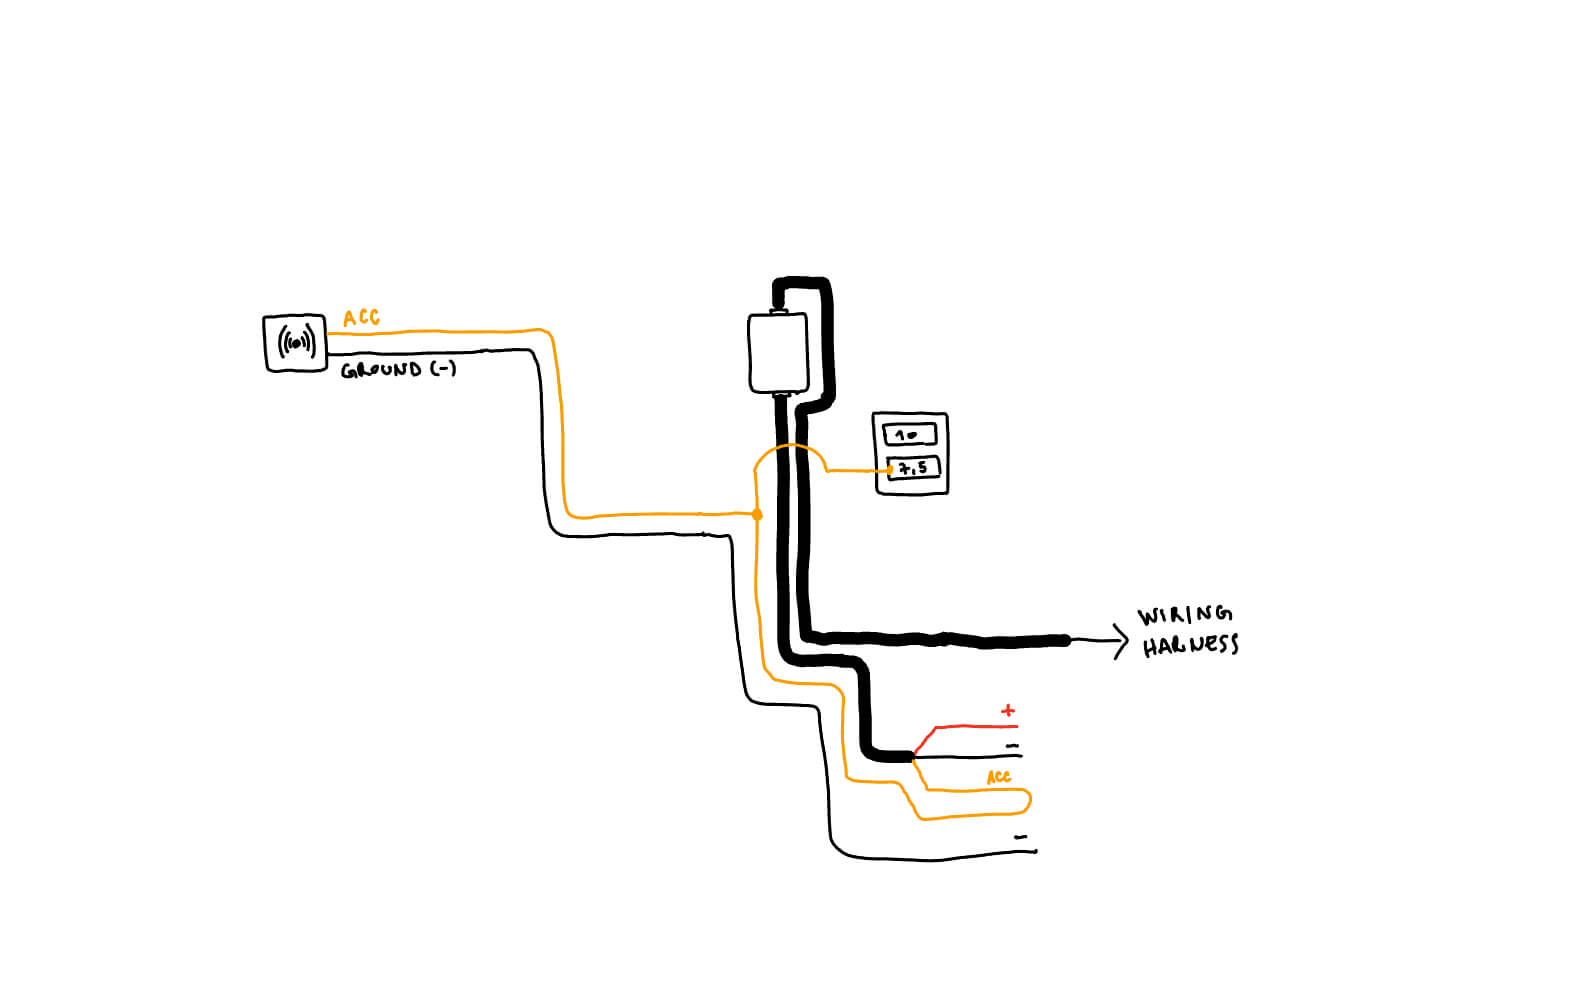
The Wave Radar cables were too short—so I had to extend them.
The Power Unit cable was too long—so I shortened it.
The ACC wire from the Power Unit was bundled with the main power wires, but my switched live wire was located near the Power Unit itself. Not ideal.
My Solution:
I extended the ACC wire and routed it back toward the Power Unit. I could’ve removed the ACC wire entirely from the harness bundle, but that felt like overkill—so I simply “returned” the wire back to the right spot.
Finally, I connected the ACC wires from both the Wave Radar and Power Unit to a switched live wire—specifically the red/blue wire with a 7.5A fuse on the connector plug next to the alternator fuse.
Final Thoughts
Installing the Cokima CK3 on the BMW R1250GS wasn’t easy, but with some patience, zip-ties, and cable mods, it’s totally doable. If you’re planning this upgrade, be ready to improvise and make some clean, custom changes—your bike deserves it.
Got questions or need help with your install? Reach out—I’d be happy to help.
Installing aftermarket tech on your bike isn’t always plug-and-play—especially when the product is labeled “universal.” In this post, I’ll take you through my full experience installing the Cokima CK3-PLUS on my 2023 BMW R1250GS, from the tools I used to the wiring challenges I had to solve. If you’re planning a similar install, this guide might save you a few headaches.
Why I Installed the Cokima CK3-PLUS
The Cokima CK3 is a smart riding system that offers cameras, GPS, radar, and more. It’s a great upgrade—but not without its installation quirks. The wiring harnesses were “universal,” which meant custom work was required to make everything fit neatly and safely on the R1250GS.
Tools You’ll Need
Here’s a quick list of tools I used:
Torx T20 – for removing the OEM BMW GPS holder
Torx T25 – for fairings and the positive battery pole
Torx T30 – for removing Fuel-Tank Cover Middle
10mm wrench – for the negative battery pole
Multi-purpose electrician tool
Side cutter pliers and regular pliers
Zip-ties and shrink wrap
Prepping the Bike
Before diving in, I placed the bike on the center stand and removed the seats. Then I removed the following fairings in this order:
Side Panel Right
Side Cover on Fuel Tank Right
Fuel-Tank Cover Middle
Top Front Wheel Cover (just loosened the right side)
Fuel-Tank Cover Right (loosened it without removing the expanding rivet)
Battery Cover
I also disconnected the negative battery terminal and covered the contact point for safety.
Next, I removed the BMW OEM GPS Prep Set by undoing four Torx T20 bolts, cutting all zip-ties, and unplugging the connector.
Installing the Cokima CK3-PLUS System
1. Mounting the Main Unit
I started by installing the Main Unit (Host) and connecting the wiring harness to it. The hardest part here was finding a clean spot to hide all the connectors. After some trial and error, I found the perfect location—just under the right side of the Top Front Wheel Cover.
2. Connecting the Components
I installed all the components:
Cameras
Wave Radar
GPS
Controller
Power Unit (black box under the rider’s seat)
Everything was connected to the wiring harness. To keep things tidy, I zip-tied all cables under the Fuel-Tank Cover Right, turning a mess of wires into a clean, single bundle.
| | |
| | |
3. Hiding and Reassembling
Once everything was connected, I hid all the wiring as planned and reassembled all the fairings—except the battery cover, which I left off for the final wiring stage.
The Real Challenge: Power and ACC Wiring
Here’s where things got tricky:
The Wave Radar cables were too short—so I had to extend them.
The Power Unit cable was too long—so I shortened it.
The ACC wire from the Power Unit was bundled with the main power wires, but my switched live wire was located near the Power Unit itself. Not ideal.
My Solution:
I extended the ACC wire and routed it back toward the Power Unit. I could’ve removed the ACC wire entirely from the harness bundle, but that felt like overkill—so I simply “returned” the wire back to the right spot.
Finally, I connected the ACC wires from both the Wave Radar and Power Unit to a switched live wire—specifically the red/blue wire with a 7.5A fuse on the connector plug next to the alternator fuse.
Final Thoughts
Installing the Cokima CK3 on the BMW R1250GS wasn’t easy, but with some patience, zip-ties, and cable mods, it’s totally doable. If you’re planning this upgrade, be ready to improvise and make some clean, custom changes—your bike deserves it.
Got questions or need help with your install? Reach out—I’d be happy to help.

Semrah Sarajlija
Jun 1, 2025